Manual/Buffer Shadows
From BlenderWiki
Contents[hide] |
Buffer Shadows
Mode: All Modes
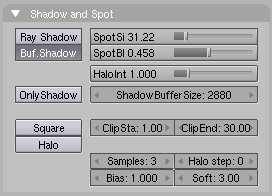
Panel: Shading/Lamp Context → Shadow & Spot
Hotkey: F5
Description
Buffered shadows provides fast rendered shadows at the expense of precision and/or quality. Buffered shadows also require more memory resources as compared to raytracing. Using buffered shadows depends on your requirements. If you are rendering animations or can't wait hours to render a complex scene with soft shadows, buffer shadows are a good choice.
Technical Details
For a scanline renderer, the default in Blender, shadows can be computed using a shadow buffer. This implies that an image, as seen from the spot lamp's point of view is rendered and that the distance --in the image-- for each point from the spot light is saved. Any point in the rendered image that is farther away than any of those points in the spot light's image is then considered to be in shadow. The shadow buffer stores this image data.
Options
- BufShadow
- Enable buffer shadows from the active lamp. This reveals additional buttons that control the shadow buffer. Each property can influence the render time and quality of the generated shadows.
Shadow buffer size
- ShadowBuffSize
- The resolution of the shadow buffer (ranging from 512 x 512px to 10240 x 10240px). The higher the value, the more accurate and detailed the shadow will be.
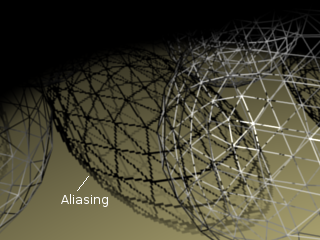
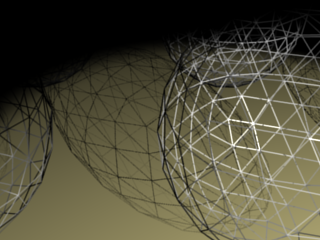
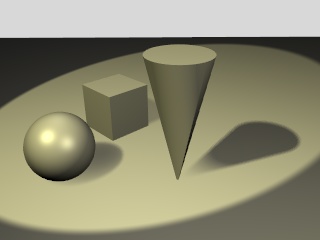
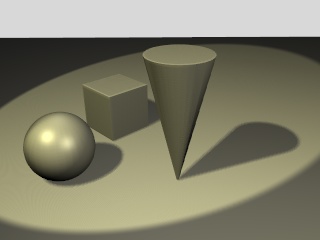
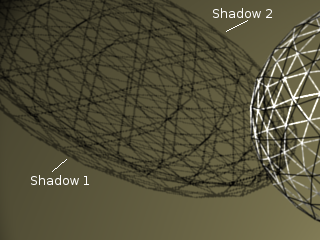
The following image shows a close up view of shadow buffer spotlight casting shadows of an IcoSphere with wire material. Notice the heavily aliased (jagged) shadows of the image (512 Shadow Buffer size) compared to the crisp shadows in (4096 Shadow Buffer size). Larger shadow buffers look much crisper, but they take longer to generate and use more memory while rendering.
Clipping region
- ClipSta/ClipEnd
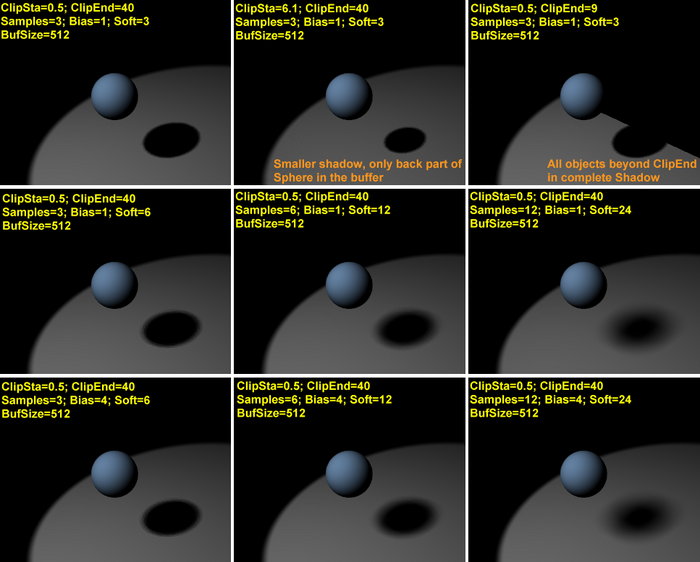
- The clipping distance within which the shadow buffer is calculated. To further enhance efficiency the shadowis only calculated within a predefined distance from the spot light's position. This range goes from ClipSta, nearer to the spot light, to ClipEnd, further away from the spot light. All objects in between ClipSta and the Spot light are never checked for shadows which results in the objects always being lit. Objects further than ClipEnd are never checked for light and are always in shadow.
To have a realistic shadow ClipSta must be less than the smallest distance between any relevant object of the scene and the spot light, and ClipEnd must be larger than the largest distance.
| Note:
For best shadow quality and most efficient use of resources, make ClipSta as large as possible and ClipEnd as small as possible, just so it barely encapsulates the objects you want to be shadowed. This minimizes the volume where shadows will be computed and devotes the most resources to the area in focus. |
Buffer Sampling
- Samples
- The number of samples taken and filtered together for the final shadow result
As well as raising the ShadowBuffSize fore a more accurate result, raising the number of samples can also help by having more data for the renderer to analyse in the shadow calculation. The smaller the ShadowBuffSize the larger Samples: needs to be to have an appreciable effect. Higher Sample values give better anti-aliasing, but require much longer computation times.
Samples work by anti-aliasing the shadow buffer, after it has been computed, by averaging the shadow buffer's pixel value over a square of a side of a given number of pixels. The averaging is performed with a grid applied to each pixel and Samples specifies the size of the grid. A Samples size of 3 means a 3x3 grid.
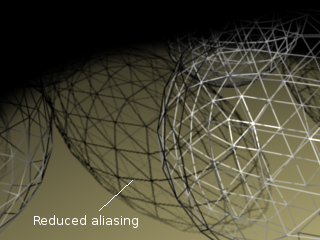
In (Sample size 3, Shadow buffer size 2048) the aliasing is better than a ShadowBuffSize of 512 but with 1/2 the ShadowBuffSize of 4096. This saves some memory resources but increases the rendering time. You can continue to increase the Samples size but eventually you will reach diminishing returns and increase rendering time.
| Note:
Using a high number of samples is necessary to smooth out soft shadows when using high Soft values. |
Shadow Bias
- Bias
- Offsets shadows from the object that casts them. Lowering the Bias value moves shadows closer to the object, and can help to fix artifacts at contact points
In the following examples, the default Bias value of 1.0 gives problems in the shadows where the objects come into contact with the floor plane. Lowering the Bias brings the shadows closer to the casting objects to fix this.
Soft Shadows
- Soft
- The size of the area over which the buffer samples are scattered and blurred. Softness is similar to the Samples property of the area lamp but instead of multiple lights Soft duplicates shadow samples. You can see this by increasing Soft value far beyond the Samples setting. For smooth results, the Soft's value shouldn't be more than double the Samples value.
(Extreme softness) is an example of the Soft value at ten times that of the Samples (2) value. Notice the duplicate shadows are obviously very far apart. As with the other buffer properties Soft is an illusionary effect and when taken to extremes the effect becomes obvious.
Examples
Below are various examples using a solid sphere with shadows cast against a plane object. Note how the different settings affect the shadow that is cast. You get everything from sharp shadows to very soft shadows.
Hints
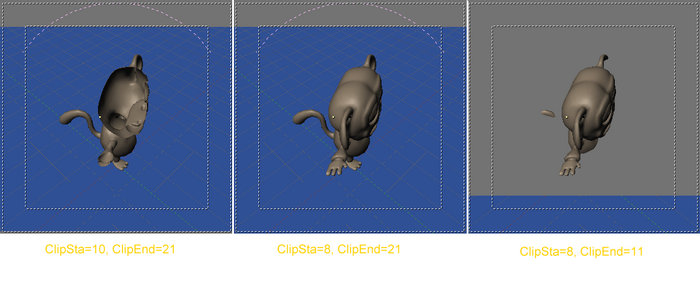
Any object in Blender can act as a Camera in the 3D view. Hence you can select the Spot Light and switch to a view from its perspective by pressing Ctrl NumPad 0. What you would see, in shaded mode, is shown in (Spot Light Clipping tweak)
The left frame shows ClipSta too high, the Centre has it correct and the right shows ClipEnd too low. All object(s) nearer to the Spot light than ClipSta and further from ClipEnd is not shown at all. Hence you can fine tune these values by verifying that all shadow casting objects are visible.
|
