Manual/Lattice Modifier
From BlenderWiki
Contents[hide] |
Lattice Modifier
Mode: Object Mode
Panel: Editing Context → Modifiers
Hotkey: F9
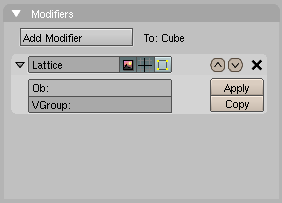
The Lattice modifier deforms the base object according to the shape of a Lattice object.
Options
- Ob:
- The Lattice object with which to deform the base object.
- VGroup:
- An optional vertex group which controls the strength of the deformation.
Hints
The Lattice Modifier has the same functionality as its earlier counterpart. The primary differences between the earlier version and the implementation as a Modifier is that now the effect can be applied in realtime, while editing, to any object type without concern for a parent/child relationship.
Instead, one only has to type the name of the lattice object into the Ob: field and the modifier takes effect immediately. You can even see the effect on the object inside edit mode using the Cage Mode (6) button.
There is a separate panel for controlling the Lattice Modifier called Lattice. This panel is where lattice attributes are controlled.
A Lattice consists of a non-renderable three-dimensional grid of vertices. Their main use is to give extra deformation capabilites to the underlying object they control. These child objects can be Meshes, Surfaces and even Particles.
Why would you use a Lattice to deform a mesh instead of deforming the mesh itself in Edit Mode? There are a couple of reasons for that:
- First of all: It's easier. Since your mesh could have a zillion vertices, scaling, grabbing and moving them could be a hard task. Instead, if you use a nice simple lattice your job is simplified to move just a couple of vertices.
- It's nicer. The deformation you get looks a lot better!
- It's fast! You can use the same lattice to deform several meshes. Just give each object a lattice modifier, all pointing to the same lattice.
- It's a good practice. A lattice can be used to get different versions of a mesh with minimal extra work and consumption of resources. This leads to an optimal scene design, minimizing the amount of modelling work. A Lattice does not affect the texture coordinates of a Mesh Surface. Subtle changes to mesh objects are easily facilitated in this way, and do not change the mesh itself.
Example/Tutorial(s)
There are example tutorials in the Tutorials section. Ones shows how to shape a fork and the other shows how to make one object follow the shape of another.
Here is a really quick example of creating landscape terrain.
| Note: I use the Top 3D Window to perform some of these actions. |
First start with a Plane Mesh object and subdivide it about 5 times using the "Subdivide" button in the Mesh Tools panel and click "Slow Draw" (All Edges in 2.43) so we can see all the faces in wireframe mode.
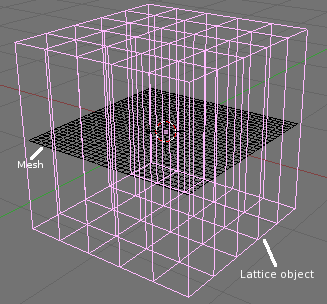
And then add a Lattice object to the scene. The default name for the Lattice object is "Lattice". Scale the Lattice to fit around the Mesh object using the S.
At this time the Lattice and the Mesh are independent of each other. Neither knows of the other. We associate them using the Lattice Modifier. Go ahead and select the Mesh object and add a Lattice Modifier to it. Then fill in the "Ob:" field with the name of the Lattice object, which by default is called "Lattice". Be careful the field is case sensitive.
Go back to the Lattice object and bump up the U and V subdivisions to "6" each. (Lattice and Plane) is what we have so far as viewed from a perspective 3D window.
Now we can begin to deform the Mesh object by going into Edit Mode while the Lattice object is selected. Grab a vertex, or two, and drag them up the Z-axis (Z). Then grab a few more and move them down the Z-axis. Note, if you feel you don't have enough vertices on the Lattice object you can always exit Edit Mode (i.e. Object mode ) and bump up the U and V subdivisions even more.
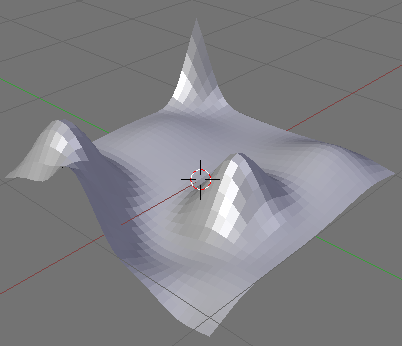
(Quick landscape complete) is my attempt at creating a landscape. the landscape is in solid mode with the Lattice object hidden on another Layer (M).
|


