Manual/Node Materials
From BlenderWiki
Contents[hide] |
Introduction
In addition to creating materials as just described using all the settings on all the materials panels, Blender allows you to create a material by routing basic materials through a set of nodes. Each node performs some operation on the material, changing how it will appear when applied to the mesh, and passes it on to the next node. In this way, very complex material appearences can be achieved.
You should already be familiar with general material concepts and how to create materials/textures using the material panel. You should also have a general understanding of the texture coordinate systems available in Blender (e.g. Orco, UV, etc.). Also, when reading this I intend to purposely skip aspects of a node because in later sections you will see the function expanded upon. Each section builds off the previous.
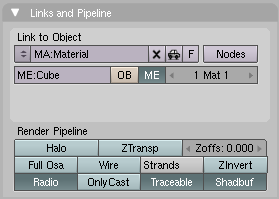
I will begin by saying that the node system does not make the material pane obsolete. Many features and material settings are still only accessible through the material panel (e.g. Ray Mirror). However with the advent of nodes, more complex and fantastic materials can be created since we now have greater control. So let’s begin with a normal material (Links and Pipeline tab).
Here we have the standard material we have added to a cube mesh.
I could, as I have in the past, add color and other settings to this
material and it would certainly look nice. But let’s say I am just not
getting what I am looking for? What if I what to control the creation
more tightly or add more complexity? Here is where nodes come in.
Making this node map is accomplished by working in a Node Editor window. This section covers:
- Node editor window and basic controls
- How to work with a node (general)
- The specific types of nodes available for materials
Accessing The Node Editor
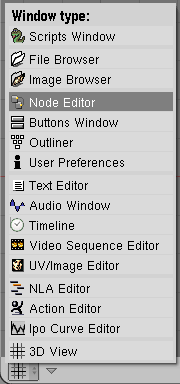
First lets enter the node editor (Select the Node Editor window) and make sure that the node editor has the material node button (the sphere icon) pressed (Node Editor Toolbar), not the composite node button.
Enabling Node Materials in the Material Buttons
Let’s take the base material (Links and Pipeline tab) and hit
the node button next to the material name in the material panel or the
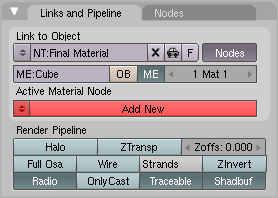
node editor. You will see a change in the material panel (Links and Pipeline Node tab).
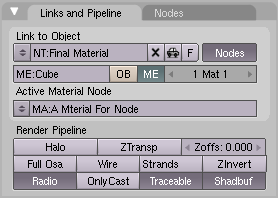
What you have just done is told Blender to make the material you were on (in this case "Final Material") to become the node tree (hence the new name - NT: versus MA:). Under the node tree you can see that it is asking you to add a new material (Links and Pipeline Node tab). Once you do (New Node Tree Material) you will create a material (MA:) that is under node tree. After adding a material to the node tree, two nodes will appear in the node editor - a material node, and an output node.
It is important to note that you can add a new material (which
you can edit and change like any other material in the material panel),
add an already created material or append a material from another
blender file, and also use the material that you used to create the
node tree.
External Links
- Material Nodes Overview - Explains the Material ndoe editor, material node types and some examples of node setups and node-groups.
- Blender Material Nodes - Changelog for the Blender version that introduced material nodes.
|


