Manual/Raytraced Shadows
From BlenderWiki
Contents[hide] |
Raytraced shadows
Mode: All Modes
Panel: Shading/Lamp Context → Shadow & Spot
Hotkey: F5
Description
Raytraced shadows produce very precise shadows with very low memory use, but at the cost of processing time. This type of shadowing is available to all lamp types except Hemi.
As opposed to Buffer Shadows, Raytraced shadows are obtained by casting rays from a regular light source, uniformly and in all directions. The raytracer then records which pixel of the final image is hit by a ray light, and which is not. Those that are not are obviously obscured by a shadow.
Each light cast rays in a different way. For example, a Spot Light cast rays uniformly in all directions within a cone. The Sun Light cast rays from a infinitely distant point, with all rays parallel to the direction of the Sun Light.
For each additional light added to the scene, with raytracing
enabled, the rendering time increases. Raytraced shadows require more
computation than Buffered shadows but produce sharp shadow borders with
very little memory resource usage.
Options
To enable raytraced shadows two actions are required:
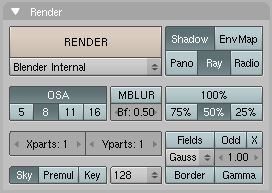
- Enable shadows globally from the Scene context (F10) using the Shadow button on the Render panel; see (Render panel).
- Enable Raytracing globally from the same panel using the Ray button.
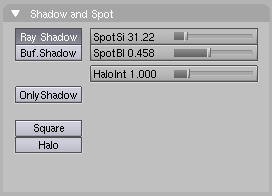
- Enable shadows for the light using the Ray Shadow button on the Shading context Shadow and Spot panel. This panel varies depending on the type of light.
For further information about the Shadow and Spot panel see the section on Lamp types.
Area lamps
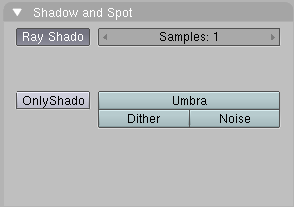
Area lamps provide additional options for raytraced shadows:
- Samples (SamplesX / SamplesY)
- The amount of samples taken to simulate the soft shadow. The more samples, the softer the shadows but the longer it will take to render. For Square area lamps, you have to set only one samples value (Samples). For Rect area lamps, you can set different samples values in the two co-planar directions of the Area lamp (SamplesX and SamplesY).
The following three parameters are intended for artificially boost the "soft" shadow effect, with possible loss in quality:
- Umbra
- Emphasizes the intensity of shadows in the area fully within the shadow rays. The light transition between fully shadowed areas and fully lit areas changes more quickly (i.e. a sharp shadow gradient). You need Samples values equal to or greater than 2 to see any influence of this button.
- Dither
- Applies a sampling over the borders of the shadows, in a similar same way anti-aliasing is applied by the OSA button on the borders of an object. It artificially softens the borders of shadows; when Samples is set very low, you can expect poor results, so Dither is better used with medium Samples values. It is not useful at all with high Samples values, as the borders will appear already soft.
- Noise
- Adds noise to break up the edges of solid shadow samples, offsetting them from each other in a pseudo-random way. Once again, this option is not very useful when you use high Samples values where the drawback is that Noise generates quite visible grainyness.
Examples
The first image on the left shows a Samples setting of 2 which generates 4 lights and hence 4 shadows. You can clearly see the shadows, but if you stand back far enough from the image it will appear as a single "soft" shadow. This can be improved by enabling Dithering and improved further by enabling Noise.
Hints
If your computer isn't very fast, you could find it useful to set a low Samples value (like 2.00) and activate Dither and/or Noise in order to simulate slightly softer shadows. However, these results will never be better than the same lighting with high Samples values.
|


