Manual/Subsurface Scattering
From BlenderWiki
Contents[hide] |
Subsurface Scattering
Many organic and some inorganic skins are not totally opaque right at the surface, so light does not just bounce off the top surface. Instead, some light also penetrates the skin surface, and scatters around inside, taking on the color of the insides and emerging back out to blend with the surface reflection. Human/animal skin, the skin of grapes, tomatoes, fruits, wax, gels (like honey, or Jello) and so on all have subsurface scattering (SSS), and photo-realism really cannot be achieved without it.
SSS can be found in the Material (F5) panel, and is limited to diffuse shading only, it does not affect specular shading.
| Scatter Color Only: The SSS panel only defines the scattering color and characteristics, not the surface color. You still need to define the surface color in the Material panel. |
Enabling Sub-Surface Scattering (SSS)
First, enable SSS by clicking on the Subsurface Scattering button. You will see your preview panel render change somewhat, as additional processing kicks in.
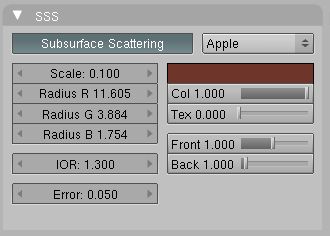
Various pre-sets are defined for you, selected by clicking the Selector to the right of Custom.
- Apple - use for organic fruits
- Chicken - a nice layer of bloody fat lies just beneath a raw bird
- Cream - great in coffee, this is a deep amount of reflection between skim and whole milk
- Ketchup - for thick consistency type syrups, gels
- Marble - stones have some SSS going on, especially Opals, very close to the surface. Use this for gemstones
- Potato - A yellow, root kind of color mostly devoid of chlorophyll. Use for roots and tubers
- Skim Milk - a whiter and much less fattening alternative to whole milk
- Skin 1 and 2 - a copper and flesh-tone color
- Whole Milk - a creamy colored scattering over a fairly narrow radius
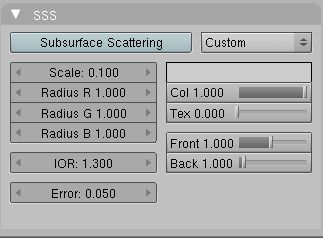
If you don't like any of them, you can define a Custom set. When you select a pre-set, the Radius values, the color and the IOR are set for you. The remaining options are not set (because they are mostly dependend on the size of your object).
SubSurface Scattering doesn't need raytracing. But since it is dependent on the incident light and shadows, you need proper shadow calculation (witch may need raytracing).
Options
The numeric sliders control how the light is scattered under the surface:
- Scale
- The scale of your object, in Blender units, across which you want the scattering effect to take place. For the presets scale 1.0 means 1 Blender unit equals 1 millimeter, scale 0.001 means 1 Blender unit equals 1 meter.
- Radius R, G, and B
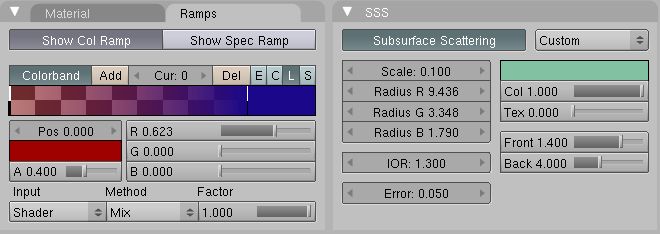
- The light blurring radius. As the light travels through the object and back up to emerge from the surface at some other point, it creates a path length. These sliders allow you to adjust the average length of that path. For example, purple wine grapes have a green 'meat' inside, so thus a short path for red and blue, but very long for green.
- IOR
- Index of Refraction - Same concept as for raytracing, the IOR value determines the falloff of incident light. Higher values means that light falls off faster and thus the jello appears denser and more murky/thick.
- Error
- This parameter controls how precisely the algorithm samples the surrounding points. Leaving it at 0.05 should give images without artifacts. It can be set higher to speed up rendering, potentially with errors. Setting it at 1.0 is a good way to quickly get a preview of the look, with errors.
The color swatch and blend control the color of whatever lies beneath the beauty (which is only skin-deep).
- <swatch>
- Click on it to bring up the color picker applet and change the dominant subsurface color.
- Col
- This controls how much the R, G, B option modulates the diffuse color and textures. Note that even with this option set to 0.0, the R, G, B option still influences the scattering behavior.
- Tex
- How much of the surface texture is blurred along with the shading.
- Front
- Factor to increase or decrease the frontscattering. When light enters through the front of the object, how much is absorbed or added? (Normally 1.0 or 100%).
- Back
- Factor to increase or decrease the backscattering. Light hitting an object from behind can go all the way through the object and come out on the front of the object. This happens mostly on thin objects, like hands and ears.
Example
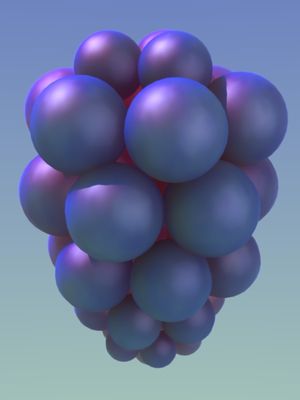
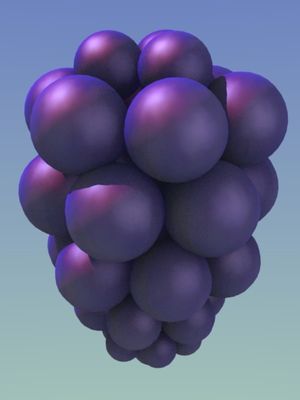
In the examples to the right, we have SSS turned on to give a green color based on the inside of a grape. The skin of the grape is a purple colorramp, and we observe that grapes have a fairly red specular glow. The scene is lit with a bright sun from above and behind, and a wide soft area light as a key light. A cloud texture is used to introduce surface variations.
With SSS, the green color adds to the blue and red, actually darkening the net color effect seen on the skin of the grape. However, it also allows light to come through the backside of the edge grapes and adds to the net light/color seen on the front side of the edge grapes. It also gives a red glow to the interior of the grape bunch. Also, where one grape is in front of another, it is darker because of chord length calculations. All of these subtle effects gives a much more convincing result.
The .blend file is available here. To experiment, increase the Back slider to 5 to see a red glow inside the cluster, as Blender allows more light to enter from the backside of the grape cluster. Increasing the Front slider makes the skins transmit more green color from the frontside of each grape, noticeable toward the bottom of each grape.
Warning: SSS is computationally expensive. First, a sort of
lightmap is constructed, somewhat like an ambient effect, and then
raytracing is invoked to calculate precise colors based on the path
that light takes through the object and whether it can be seen as it
refracts out the front side of the object, coupled with the light
coming from the backside...in other words, getting darn close to
simulating what real light actually does as it passes through an
object.
|
